Of all the approaches to chart creation, import from an Excel file is by far the most commonly used. To import data from Microsoft Excel into OrgChart Platinum, complete the following steps.
Excel Importing: First steps
1. Go to the Data tab and click on the Import button.

2. The Import Wizard will appear. Click Next.

3. Select the “Microsoft Excel” radio button (if not already selected). Click Next.
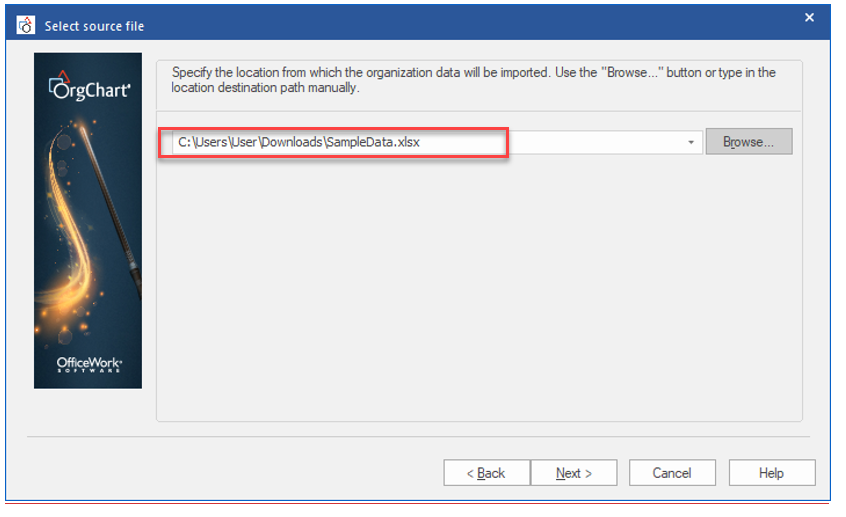
4. Specify the location of the Excel file from which you wish to import data. Click Next.
5. If you are importing data from an Excel file with multiple sheets, select the sheet from which you wish to import data in the “Available Tables” window. Click Next.

6. Select a hierarchy to use. The default is “Two column.” (Most hierarchies within chart data are two-column.) Click Next.

7. Choose which fields you would like to be visible within each chart box by clicking on the Visible checkbox for each field. Click Next.

9. Choose page breaks where you would like to produce divisions (or subcharts). For the purposes of this example, we will set breaks at “Every 1” as shown. This will present a chart with no more than two levels of management on each page. Click Next.

10. Click Next.

11. Click Finish when the import process has concluded.

Excel Importing: Results

After creating this chart you may modify it with color, fonts and border styles.