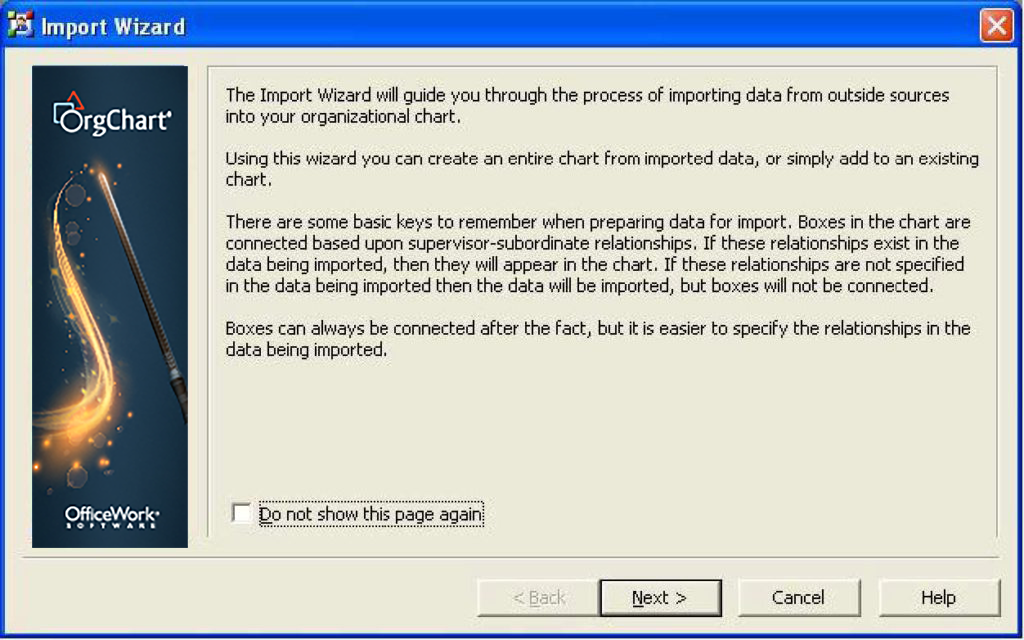
Follow the steps below, in order to import data from MS SQL server to OrgChart.
MS SQL: Selection and preparation
Choosing data source type. At this step you must choose “Microsoft SQL Server” option.
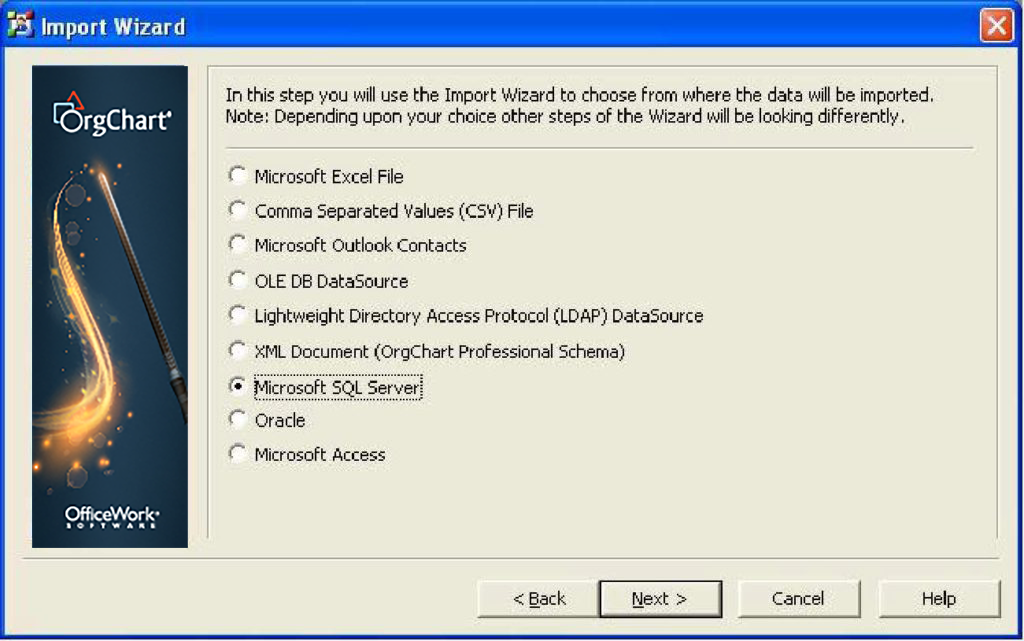
SQL Server connection parameters. First, you must know the exact SQL Server connection parameters and access credentials. Your DBS administrator should provide you with all information necessary.
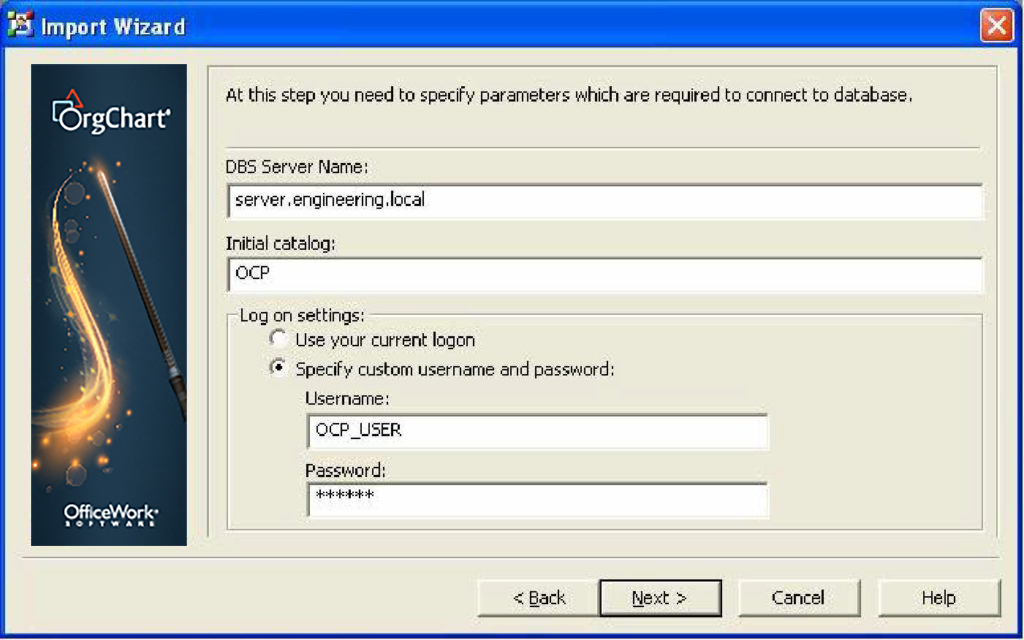
MS SQL: DB server name
Exact short or fully qualified name of DBS server. It could be presented in the following forms (names are imaginary and should be replaced by correct data when used):
- SQL_SERVER
- Sql_server.domain.local
- Sql_server.domain.local\dbs_named_instance
MS SQL: Initial catalog
Most of DBS is capable of hosting several databases. You should indicate which database you wish to connect to.
For instance: DBS server with name “SQL_SERVER” hosts 3 databases – “accounting”, “marketing_data”, “security_logs”.
You should enter “accounting” ( without parentheses ) in “Initial catalog” field, if you wish to import data from “accounting” database.
MS SQL: Login settings
This allows you to enter specific credentials to gain access to database or use your current logon. “Use your current logon” option can be used if desired DBS and database are configured to accept Windows integrated security credentials. Most commonly, this option is used in Windows Domain network environment or when connecting to locally hosted DBS, which persists directly on user’s computer.
“Specify custom username and password” can be used if specific credentials are required to gain access to the desired DBS and database. Username and password are provided by DBS administrator staff.
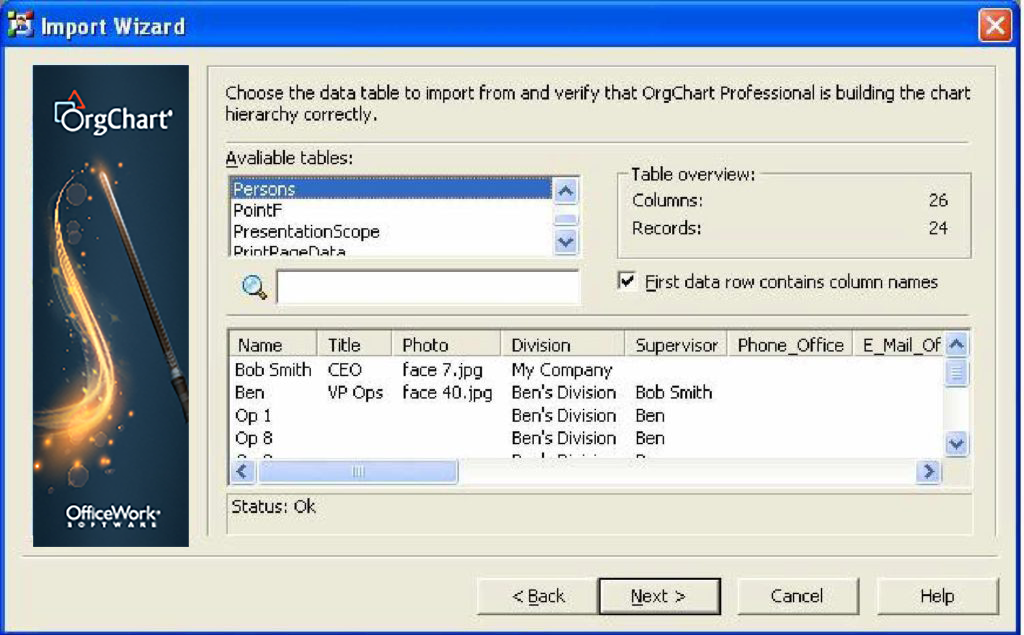
MS SQL: Source table selection
At this step you can select desired table which will be used as data source. Procedure for this step is absolutely identical to any other strictly structural data import options, like MS Excel, MS Access, etc.
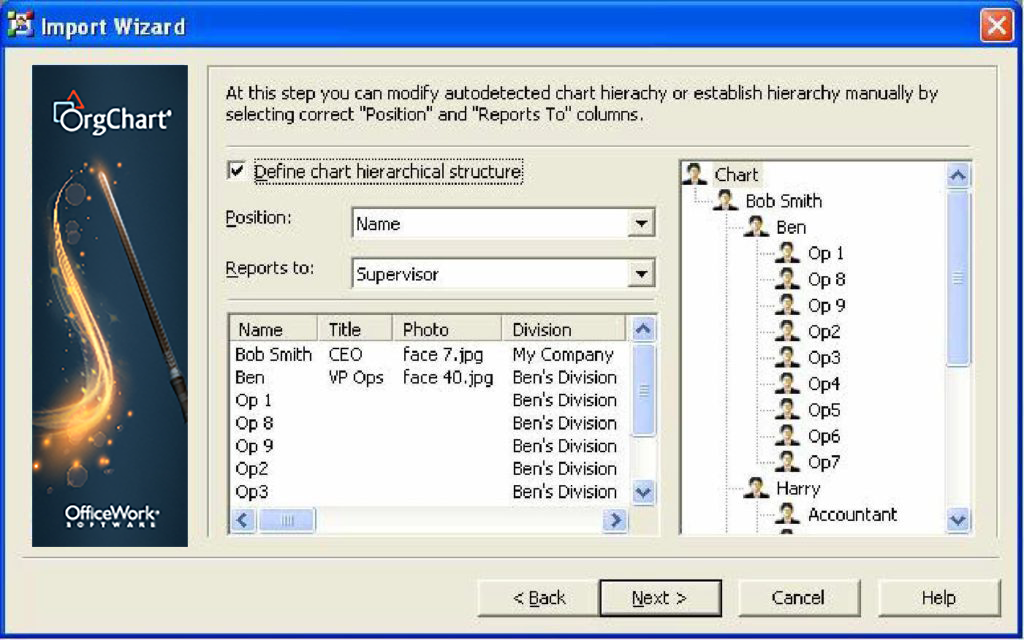
MS SQL: Hierarchy builder
At this step you can validate if hierarchical relation of imported data has been successfully predicted, or specify hierarchical relation rules manually.
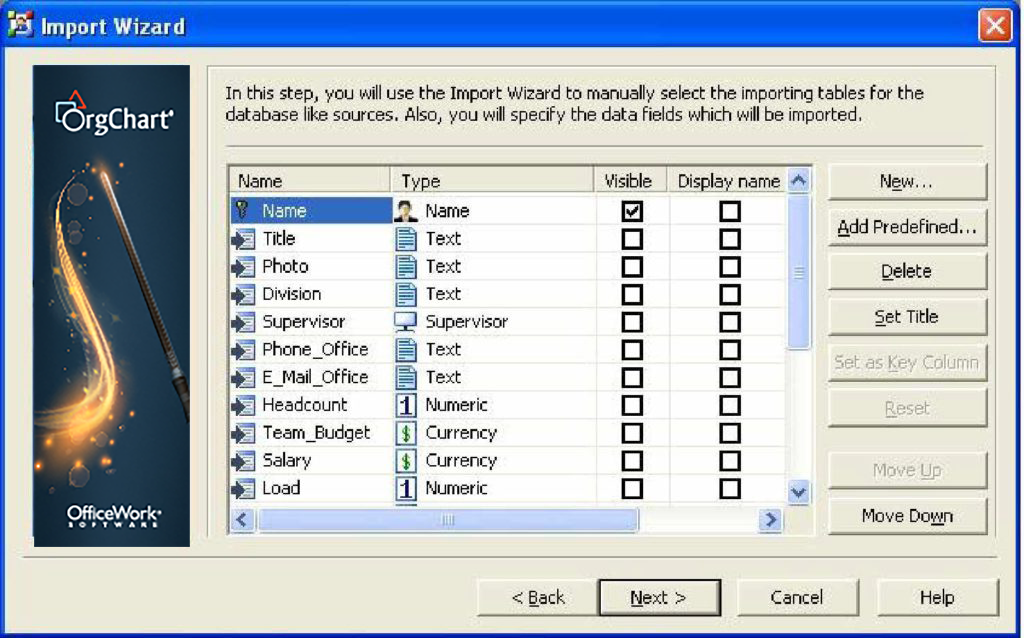
MS SQL: Data fields customization
At this step you may customize which fields should be imported, validate or manually indicate data types and set initial visibility of fields in boxes
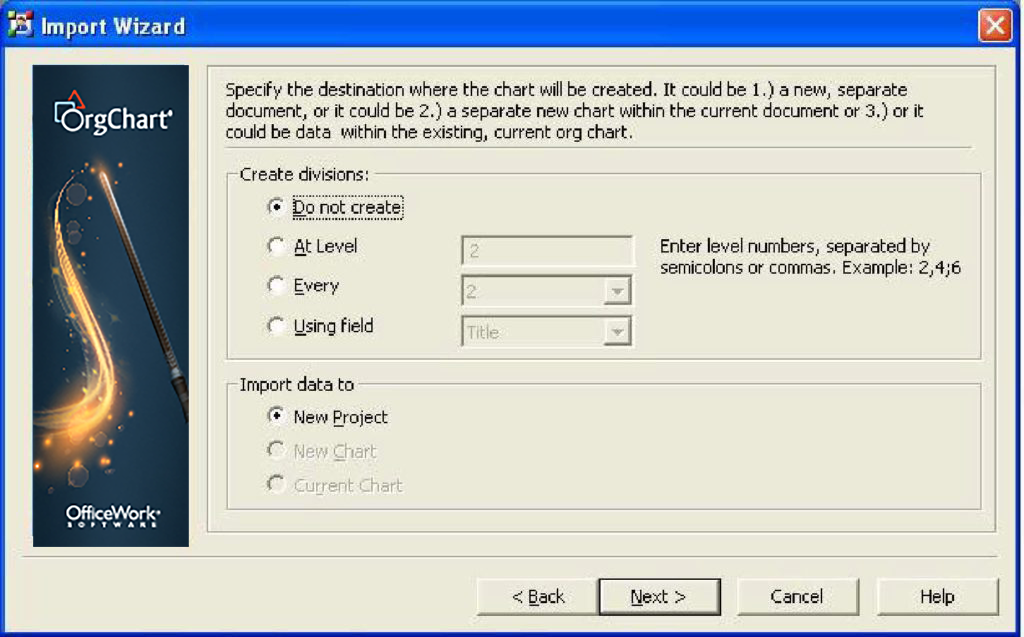
MS SQL: Division creation policy
At this step you may set how imported data should be split into divisions. You may choose where imported data should be inserted using “Import data to” options.
MS SQL: Process execution
Data gets validated and inserted into chosen destination after you press “Next” at this step.

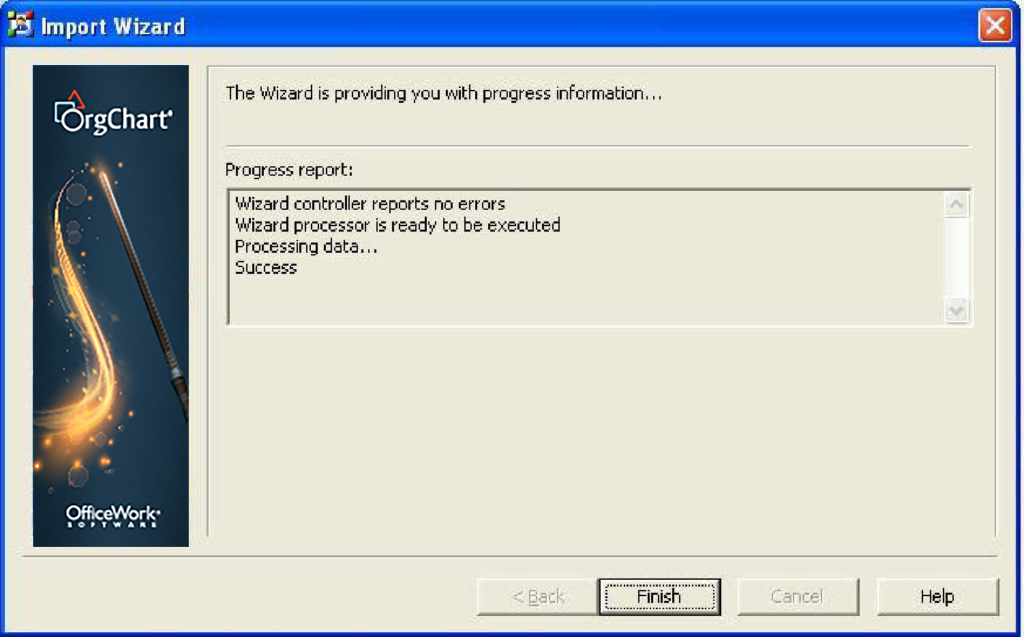
MS SQL: Final screen
Procedure results are displayed at the end of import. Any import errors are listed here, if there were any during the procedure.